Elevate Your Decor with Oil Painting on Canvas
Transforming your living space into a haven of elegance and sophistication is easier than you think. Oil painting on canvas offers a unique way to add a personal touch to your home decor. With its rich colors and textured finish, a beautifully crafted canvas painting can become the centerpiece of any room.
Whether you're looking to create a cozy atmosphere or make a bold statement, artistic decor through canvas painting can elevate your home's aesthetic. It's not just about filling a blank wall; it's about expressing your personality and style.
Key Takeaways
- Oil painting on canvas adds a personal touch to home decor.
- Canvas paintings can be the centerpiece of any room.
- Artistic decor through canvas painting elevates a home's aesthetic.
- It's a way to express your personality and style.
- Canvas paintings can create a cozy atmosphere or make a bold statement.
The Transformative Power of Oil Painting
Transforming your home with oil painting on canvas is an art form that combines creativity and personal expression. Oil painting techniques allow you to create unique pieces that reflect your personality and style.
Why Oil Paintings Make Stunning Decor Pieces
Oil paintings are renowned for their ability to add warmth and character to any room. They can become the centerpiece of your decor, drawing the eye and sparking conversation. Unlike mass-produced decor, an oil painting is a one-of-a-kind piece that can be tailored to your space.
Benefits of Oil Paintings in Home Decor:
- Adds a personal touch to your space
- Creates a unique conversation piece
- Can be customized to fit your decor style
The Personal Touch: Creating Art for Your Space
Creating art for your space allows you to infuse your personality into your home decor. With oil painting, you can choose colors, themes, and styles that resonate with you, making your space truly personalized.
| Aspect | Personalized Oil Painting | Mass-Produced Art |
|---|---|---|
| Uniqueness | One-of-a-kind piece | Reproduced multiple times |
| Customization | Can be tailored to your space | Limited to the artist's vision |
By incorporating oil painting into your home decor, you're not just decorating; you're creating a reflection of yourself. Whether you're an experienced artist or a beginner, the process of creating art for your space is a rewarding experience that can transform your home and your connection to it.
Essential Materials for Oil Painting on Canvas
Creating beautiful oil paintings on canvas starts with having the right tools. To get started, you'll need to gather a few essential art supplies that will help you bring your artistic vision to life.
Selecting the Right Canvas
Choosing the right canvas is the first step in preparing for your oil painting project. The type and size of the canvas can significantly impact your work.
Canvas Types and Sizes
Canvases come in various types and sizes. You can choose from cotton or linen, with cotton being more budget-friendly and linen offering a more premium texture. Sizes range from small (around 8x10 inches) to large (48x60 inches or more). Consider the scale of your painting and your workspace when deciding.
Pre-stretched vs. DIY Stretching
You can opt for pre-stretched canvases or buy canvas rolls and stretch them yourself. Pre-stretched canvases are convenient but may limit your size options. DIY stretching gives you more flexibility in terms of size but requires additional tools and effort.
Oil Paints: Brands and Colors for Beginners
For beginners, it's advisable to start with a basic palette of oil paints that includes primary colors, black, and white. Brands like Winsor & Newton and Grumbacher offer high-quality paints. Start with a limited palette to understand color mixing before expanding.
Brushes and Tools You'll Need
Painting brushes come in various shapes and sizes. Natural hair brushes are ideal for oil painting due to their ability to hold and blend paint. You'll also need palette knives for mixing and applying thick paint, a palette for mixing colors, and solvents like turpentine or mineral spirits for cleaning.
By selecting the right art supplies, you'll be well on your way to creating stunning oil paintings on canvas.
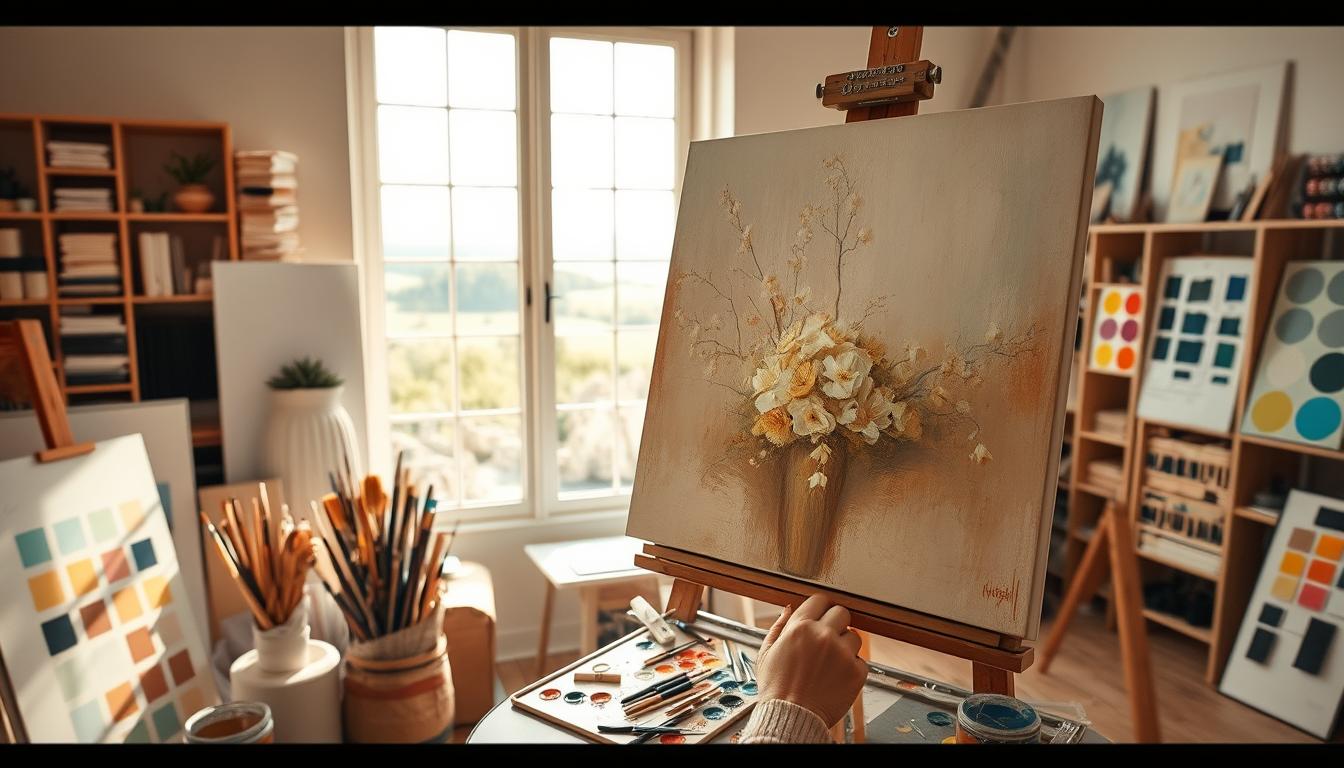
Setting Up Your Workspace
The right environment can inspire your creativity and improve your oil painting skills. A well-designed workspace not only makes the painting process more enjoyable but also enhances the quality of your work.
Creating the Ideal Painting Environment
To create an ideal painting environment, consider the space where you'll be working. It should be quiet, comfortable, and free from distractions. A dedicated space for painting helps you focus on your art and maintain productivity.
Proper Lighting and Ventilation
Proper lighting is crucial for oil painting. Natural light is ideal, but if you're painting in the evening or in a room without sufficient natural light, invest in high-quality lamps that mimic daylight. Additionally, good ventilation is essential to remove fumes from paints and solvents, ensuring a healthy painting environment.
Organizing Your Supplies for Efficiency
Organizing your art supplies efficiently can save you time and reduce stress. Use storage containers or shelves to keep your paints, brushes, and other tools within easy reach. Labeling your supplies can also help you quickly find what you need, allowing you to focus on your art.
By setting up your workspace with these considerations in mind, you'll be well on your way to creating a productive and inspiring environment for oil painting on canvas.
Preparing Your Canvas
The key to a successful oil painting lies in the preparation of your canvas. A well-prepared canvas ensures that your artwork will last for years to come and provides a smooth surface for your creative expression.
Priming Techniques
Priming your canvas is a crucial step that creates a uniform base for painting. Use a high-quality primer, such as gesso, to coat your canvas. Apply it in thin layers, allowing each layer to dry before adding the next. This helps prevent cracking and ensures a durable surface.
Creating an Underpainting
An underpainting is a preliminary layer of paint that helps establish the composition and values of your painting. It can be done using a monochrome color or a burnt sienna tone. This step is essential for creating depth and dimension in your final artwork.
Sketching Your Design
Once your canvas is primed and underpainted, it's time to sketch your design. There are two main methods for sketching: transfer methods for complex designs and freehand sketching.
Transfer Methods for Complex Designs
For intricate designs, you can use transfer methods. Graphite paper or tracing paper can be used to transfer your sketch onto the canvas accurately. This method is particularly useful for detailed compositions.
Freehand Sketching Tips
Freehand sketching allows for more spontaneity and creativity. Use a charcoal or a thin brush with paint to lightly sketch the main elements of your composition. Remember, this is just a guide, so don't worry about making mistakes.
As the famous artist, Bob Ross, once said,
"We don't make mistakes, just happy little accidents."
This mindset can be particularly liberating when sketching your design freehand.
Basic Oil Painting Techniques for Beginners
Beginners can quickly improve their oil painting skills by learning a few key techniques. Mastering the basics of color mixing, brush strokes, and layering can significantly enhance the quality of your artwork. In this section, we'll explore the fundamental techniques that every beginner should know to get started with oil painting on canvas.
Understanding Color Mixing
Color mixing is a crucial aspect of oil painting. It involves creating the desired hues and shades by combining different colors. A good understanding of color theory can help you achieve the effects you want in your painting.
Creating a Limited Palette
A limited palette is a great way for beginners to simplify the color mixing process. By restricting your palette to a few core colors, you can create a cohesive look in your painting. For example, you can start with a basic palette that includes titanium white, yellow ochre, burnt sienna, and ultramarine blue.
Using a limited palette helps in achieving harmony in your artwork and makes the mixing process less overwhelming.
Mixing Techniques for Vibrant Colors
To achieve vibrant colors, it's essential to understand how to mix your paints effectively. Start by mixing small amounts of paint on your palette. Experiment with different ratios of colors to achieve the desired shades. Remember, it's easier to add more paint than it is to remove excess paint from your mix.
Brush Strokes and Textures
The way you apply paint to the canvas can greatly affect the texture and overall appearance of your artwork. Different brush strokes can create a variety of effects, from smooth, blended areas to thick, textured strokes.
Experimenting with different brush types and strokes can add depth and interest to your painting. For instance, using a palette knife can create thick, heavy textures, while a soft brush can produce smooth, blended areas.
Layering and Blending Methods
Layering and blending are essential techniques in oil painting. They allow you to build up colors and achieve complex, nuanced effects. Start by applying a base layer, then gradually build up additional layers, allowing each layer to dry before adding the next.
Blending involves merging colors together on the canvas to create smooth transitions between them. You can use a soft brush or a blending tool to achieve this effect.
Step-by-Step Oil Painting on Canvas Tutorial
Embark on a creative journey with our step-by-step oil painting on canvas tutorial, designed to guide you through the process of creating stunning artwork.
As we explore the world of oil painting, it's essential to understand that the key to a beautiful piece lies in the preparation and execution. As the famous artist, Bob Ross, once said, "We don't make mistakes, just happy little accidents."
Planning Your Composition
The first step in our oil painting tutorial is planning your composition. This involves deciding on the subject, arranging elements, and considering the overall balance of the painting.
To start, sketch out your idea on paper, considering the rule of thirds and other composition techniques. Use a pencil to lightly draw the main elements onto your canvas, creating a guide for your painting.
Building the Background
With your composition sketched out, it's time to build the background. This is a crucial step in setting the tone for your entire painting.
Use a large brush to apply a thin layer of paint, gradually building up the colors and textures. As
"The background is a wonderful place to start, as it sets the tone for the entire painting."
Adding Detail and Dimension
Once the background is established, you can start adding detail and dimension to your painting. Use smaller brushes to add finer details, and don't be afraid to experiment with different techniques.
Layering and blending are key to creating depth and dimension in your painting. Use a palette knife or thick brushes to add textured elements, and thin brushes for finer details.
Finishing Touches
The final stage of our oil painting tutorial involves adding the finishing touches. This is where you refine your painting, making any necessary adjustments to the composition, color, and detail.
Take a step back and evaluate your work, making any final adjustments before declaring your painting complete. As you finish, remember that "art is not just about the end result, but the journey itself."
Advanced Techniques to Enhance Your Artwork
Advanced oil painting techniques can significantly enhance the quality and visual impact of your artwork. By incorporating these methods into your creative process, you can achieve more sophisticated and engaging pieces.
Creating Depth and Perspective
One of the key elements in creating a compelling oil painting is depth and perspective. Techniques such as layering, atmospheric perspective, and linear perspective can help achieve a sense of distance and dimensionality. Atmospheric perspective, for instance, involves fading objects into the background to create a sense of depth.
Texture and Impasto Techniques
Adding texture to your painting can make it more visually interesting. Impasto is a technique where paint is layered thickly on the canvas, creating a raised surface. This can be achieved using a palette knife or thick brushes.
Glazing for Luminosity
Glazing involves applying multiple thin, transparent layers of paint over a base coat to achieve a deep, luminous color. This technique can add richness and complexity to your artwork.
Transparent vs. Opaque Glazing
Understanding the difference between transparent and opaque glazing is crucial. Transparent glazing allows the underlying layers to show through, creating a sense of depth, while opaque glazing covers the underlying layers.
Building Up Layers for Richness
To achieve a rich, layered look, it's essential to build up your painting gradually. Start with a base layer, then add subsequent layers, allowing each to dry before adding the next.
| Technique | Description | Effect |
|---|---|---|
| Impasto | Layering thick paint | Textured, raised surface |
| Glazing | Applying thin, transparent layers | Deep, luminous color |
| Atmospheric Perspective | Fading objects into the background | Sense of depth and distance |
Common Mistakes and How to Fix Them
As you embark on your oil painting journey, you'll likely encounter a few common mistakes. Fortunately, many of these issues can be easily corrected with the right techniques and a bit of practice.
Dealing with Muddy Colors
One of the most common mistakes in oil painting is creating muddy colors. This occurs when colors are overmixed or when too many colors are combined, resulting in a dull, brownish hue. To avoid muddy colors, try to limit your palette and mix colors in small, controlled amounts.
- Use a limited color palette to maintain color clarity.
- Mix colors in small amounts to avoid overmixing.
- Experiment with layering colors to achieve desired shades.
Correcting Composition Issues
Composition issues can greatly impact the overall effectiveness of your painting. To correct composition problems, step back from your work and evaluate the placement of elements within the piece.
"The most important thing in composition is to create a sense of balance and harmony."
Fixing Drying Problems
Drying problems can be frustrating, especially when working with oil paints, which take time to dry. To address drying issues, it's essential to understand the factors that influence drying time.
Working with Slow-Drying Areas
If certain areas of your painting are drying too slowly, try using a drying medium or gently heating the area with a hair dryer on a low setting.
Addressing Cracking and Peeling
Cracking and peeling can occur when paint is applied too thickly or when the painting is not properly primed. To fix these issues, gently sand the affected area and reapply primer or paint as needed.
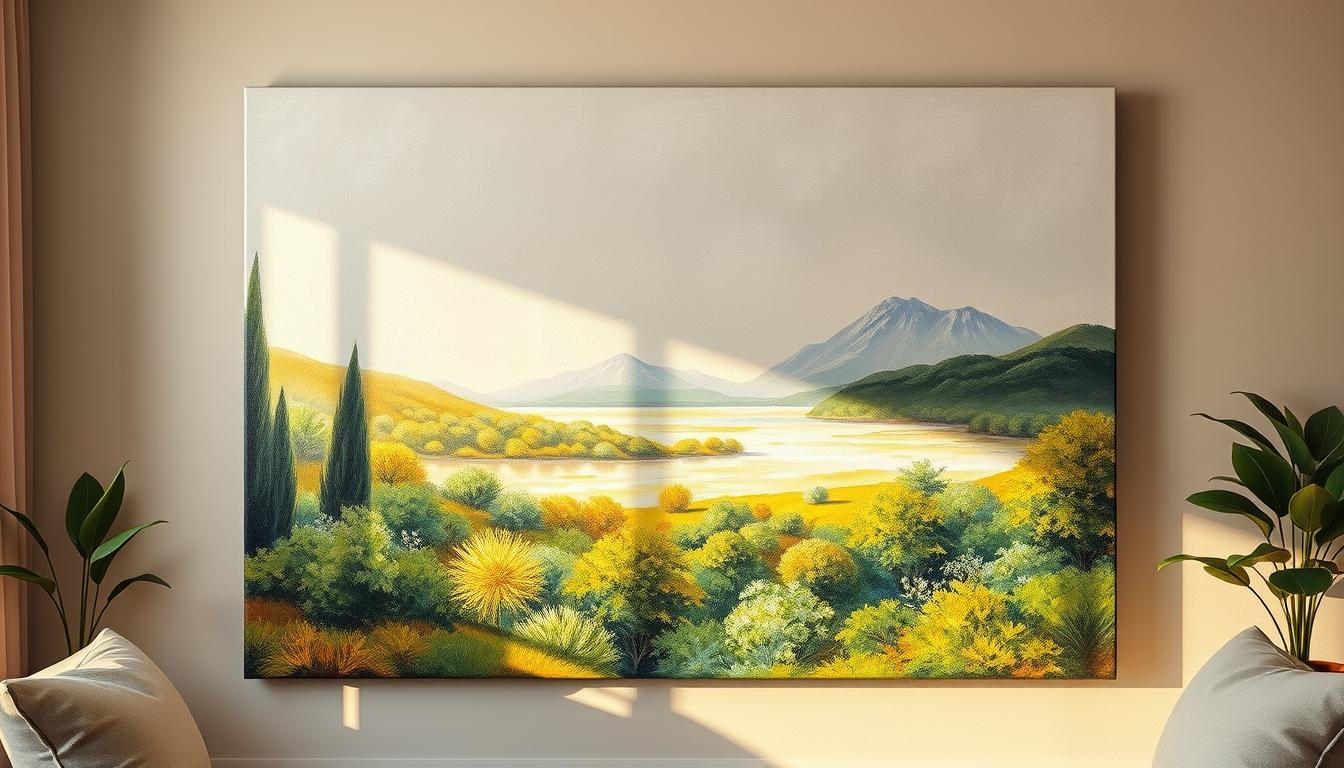
Displaying Your Oil Painting in Home Decor
The final touch to your artistic journey is displaying your oil painting in a manner that complements your home decor. A well-placed oil painting can elevate the ambiance of any room, making it feel more inviting and personalized.
Choosing the Perfect Location
When deciding where to display your oil painting, consider the room's purpose and the natural lighting available. For instance, a serene landscape painting can be a great addition to a bedroom, creating a calming atmosphere. In contrast, a vibrant abstract piece might be more suitable for a living room or entertainment area.
Lighting Your Artwork Effectively
Proper lighting can make or break the display of your oil painting. Natural light is ideal, but if that's not possible, invest in good quality artificial lighting. Avoid direct sunlight, as it can cause the colors to fade over time. Instead, use soft, indirect lighting to highlight the textures and colors of your artwork.
Creating Gallery Walls with Multiple Paintings
If you have multiple oil paintings, consider creating a gallery wall. This can add visual interest to a room and create a unique focal point. Start by laying out your paintings on the floor to experiment with different arrangements. Then, use a level and a pencil to mark the wall where each piece will hang, ensuring they are evenly spaced and aligned.
Complementing Your Existing Decor Style
To ensure your oil painting complements your existing decor, consider the style and color palette of the room. For example, a modern room might benefit from a bold, contemporary piece, while a traditional room could be enhanced by a classic, realistic painting. Use your artwork to tie together different elements of your decor, creating a cohesive and harmonious space.
By thoughtfully displaying your oil painting, you can enhance your home's decor and showcase your artistic creation to its fullest potential.
Conclusion: Transforming Your Space with Personalized Art
Creating oil paintings on canvas is a journey that not only enhances your artistic skills but also transforms your home decor with unique, personalized art. By applying the techniques and tips outlined in this article, you can produce stunning pieces that reflect your personality and style.
Oil painting benefits extend beyond the canvas, as the process of creating art can be therapeutic and fulfilling. As you display your finished artwork in your home, you'll notice how it elevates the ambiance and adds a touch of warmth to any room, effectively transforming your home decor.
With personalized art, you have the freedom to choose colors, themes, and subjects that resonate with you, making your space truly one-of-a-kind. So, pick up your brushes, and let the world of oil painting on canvas inspire you to create beautiful, meaningful art that makes your house a home.